
Why should you do it?
Security
If you're using Cloudflare as a DNS proxy for your domain, you might have noticed that Cloudflare first sets up a flexible SSL connection.
Flexible ssl websites get all the benefits of https, Google likes them and visitors like them. Even more, these websites can leverage service workers, push notifications, and the geolocation API, while eliminating annoying browser warnings. And what's best, zero configuration needed!
Flexible SSL connection is bad.
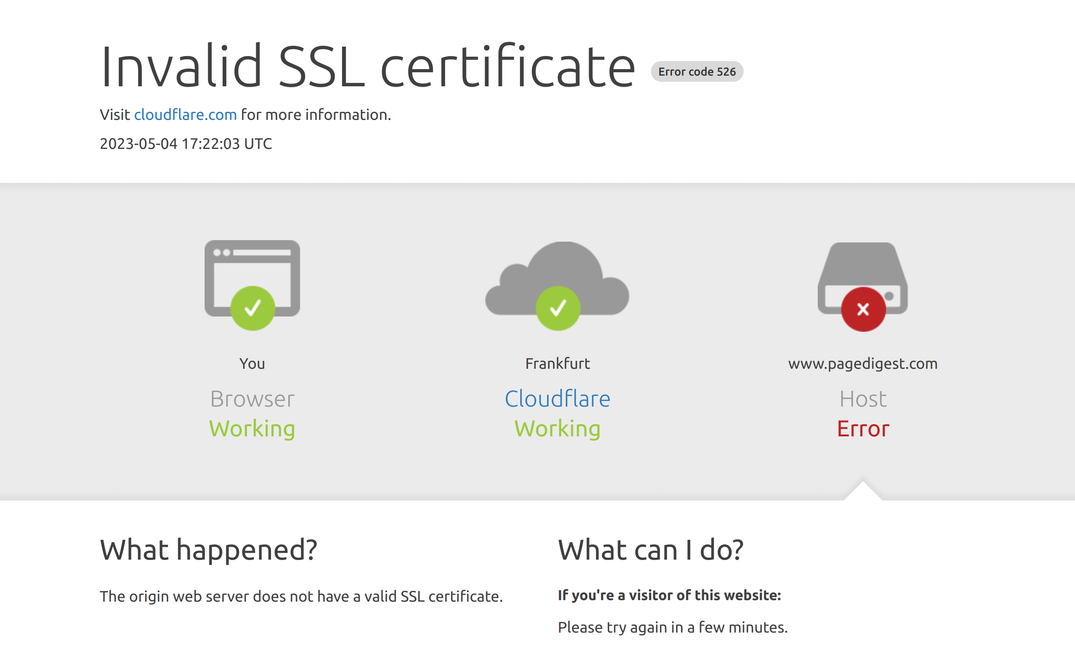
That kind of encryption just appears to be secure. See in the picture below:
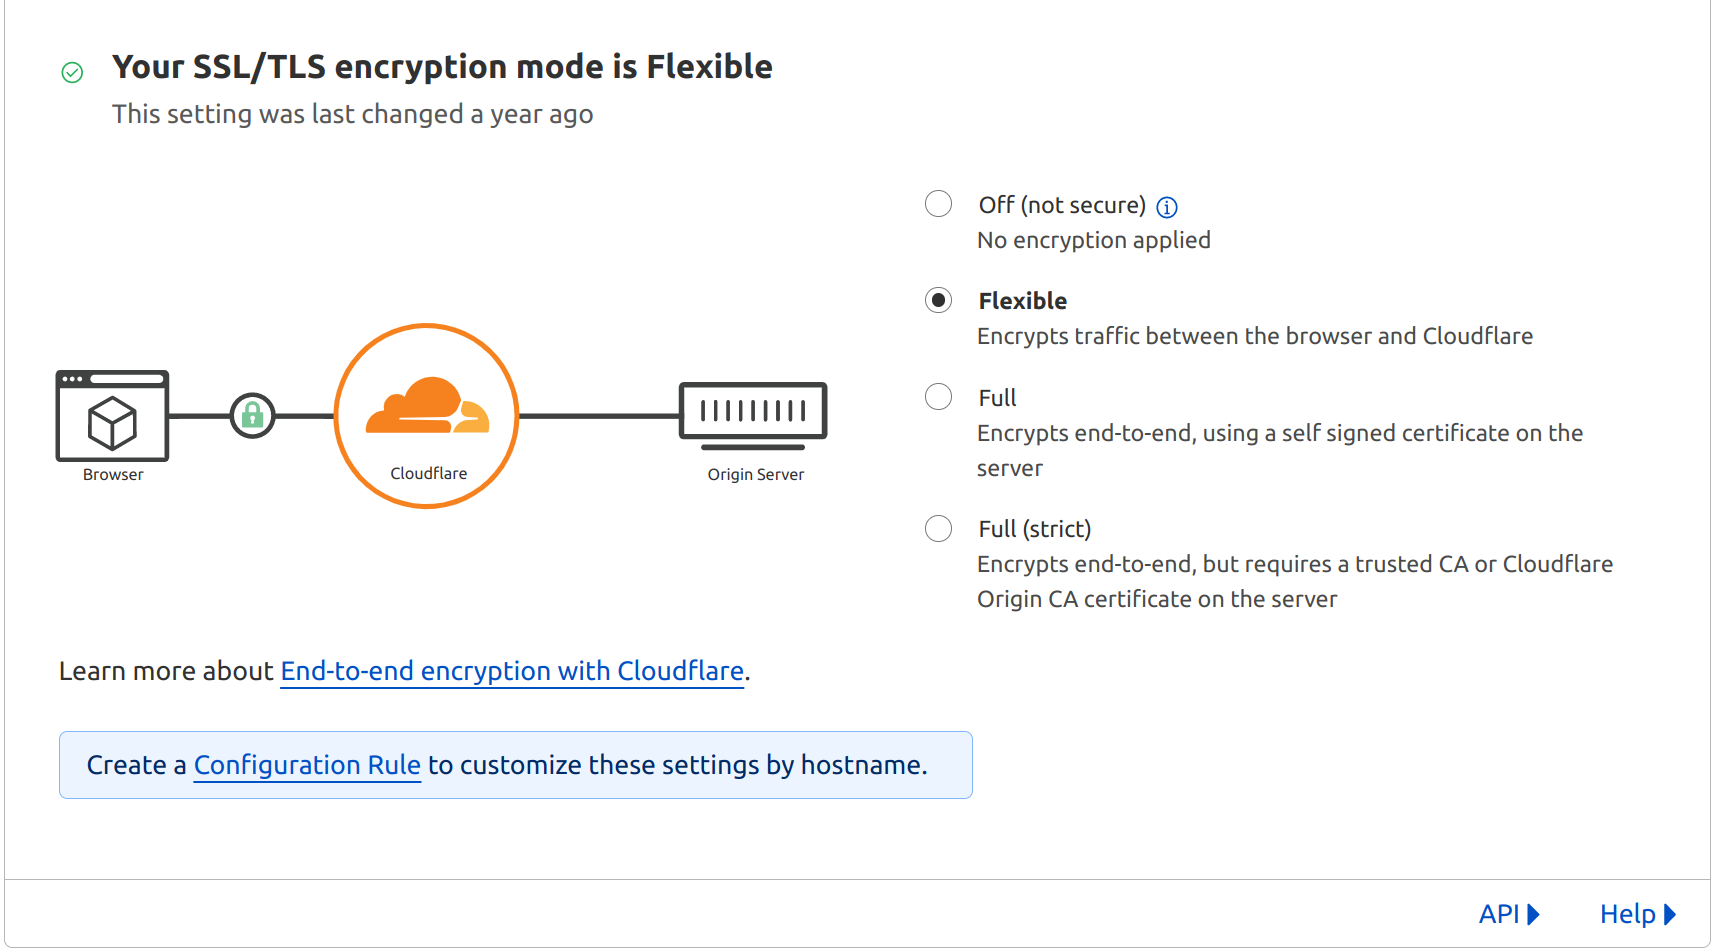
This security is only partial. While the connection between the browser and Cloudflare is encrypted, the connection between Cloudflare and your origin server is not. From Cloudflare visitor data is decrypted and forwarded to your origin server over an unencrypted http connection, leaving it vulnerable to potential attacks. I don't know which attacks are possible from Cloudflare to your server, but let's not find out.
Speed
If security isn't your thing, then you might want a faster page load. Moving to strict http encryption will not improve your page load speed directly...but if you want to use http2, then you need ssl enabled on proxy servers of your origin server. Of course, there's an overhead as now your origin server will be asked for encrypting and decrypting ssl certificates. But by moving to http2 you will improve performance by allowing multiple requests to be multiplexed over a single SSL connection.
Configuration recipes
Nginx
To avoid any downtime, configure your nginx to serve both 443 and 80. Later you'll set 80 to redirect to 443.
- First create your certificates on Cloudflare by going to SSL/TLS -> Origin Server -> Create certificate
- Save your certificates (first field is .crt, second field is .key) to certificates location on your origin server. On bitnami it would be /stack/nginx/conf/bitnami/certs
- Change the ownership of the SSL certificate and private key files to the web server user (usually "www-data" or "bitnami"). You can double-check by opening nginx.conf and search for user, usually found at the top of the conf file.
sudo chown www-data:www-data /path/to/your/certificate.crt
sudo chown www-data:www-data /path/to/your/private-key.key- Set the file permissions to restrict access. I like to use 400 for key and 444 for crt
# owner of the file has read-only permission, while the group and others have no permissions
sudo chmod 400 /opt/bitnami/nginx/conf/bitnami/certs/*.key
# owner, group, and others have read-only permissions
sudo chmod 444 /opt/bitnami/nginx/conf/bitnami/certs/*.crt- Verify certificates are valid. Check the certificate issuer info by typing:
openssl x509 -in cert.cert -text -noout- Verify certificate key is valid:
openssl rsa -in cert.key -check -noout RSA key ok- Now you can configure nginx for your domain and configuration could look like this.
server {
  listen 80 default_server;
  server_name   .example.com;

  return 301 https://www.example.com$request_uri;
}

server {
  listen        443 ssl http2;
  server_name   .example.com;
  ssl_certificate      bitnami/certs/cert.crt;
  ssl_certificate_key  bitnami/certs/cert.key;

  //
}- path to configuration files for sites is usually in /etc/nginx/sites-available (create a shortcut to sites-enabled), or /home/bitnami/stack/nginx/conf/server_blocks
- verify nginx with
nginx -tand restart your server
Apache
- First create your certificates on Cloudflare by going to SSL/TLS -> Origin Server -> Create cerificate
- Save your certificates (first field is .crt, second field is .key) to certificates location on your origin server. On bitnami it would be
/opt/bitnami/apache/conf/bitnami/certs - Change the ownership of the SSL certificate and private key files to the web server user (usually "www-data" or "bitnami").
sudo chown www-data:www-data /path/to/your/certificate.crt
sudo chown www-data:www-data /path/to/your/private-key.key - Set the file permissions to restrict access. I like to use 400 for key and 444 for crt.
# owner of the file has read-only permission, while the group and others have no permissions
sudo chmod 400 /opt/bitnami/nginx/conf/bitnami/certs/*.key
# owner, group, and others have read-only permissions
sudo chmod 444 /opt/bitnami/nginx/conf/bitnami/certs/*.crt- Verify certificates are valid. Check the certificate issuer info by typing:
openssl x509 -in cert.cert -text -noout- Verify certificate key is valid:
openssl rsa -in cert.key  -check -noout
RSA key ok
Now you can configure apache for your domain and configuration could look like this:
<VirtualHost *:80>
    ServerName example.com
    ServerAlias www.example.com
    Redirect permanent / https://example.com/
</VirtualHost>

<VirtualHost *:443>
    ServerName example.com
    ServerAlias www.example.com
    SSLEngine on
    SSLCertificateFile /path/to/your/certificate.crt
    SSLCertificateKeyFile /path/to/your/private-key.key

    Protocols h2 h2c http/1.1
    H2Direct on
</VirtualHost>- verify ap configuration is ok with
apachectl -tand restart service.
Always Https and about HSTS
Once you've configured and verified your https connection works, I recommend that you go to
SSL/TLS -> Edge Certificates -> check options as shown in the image below.
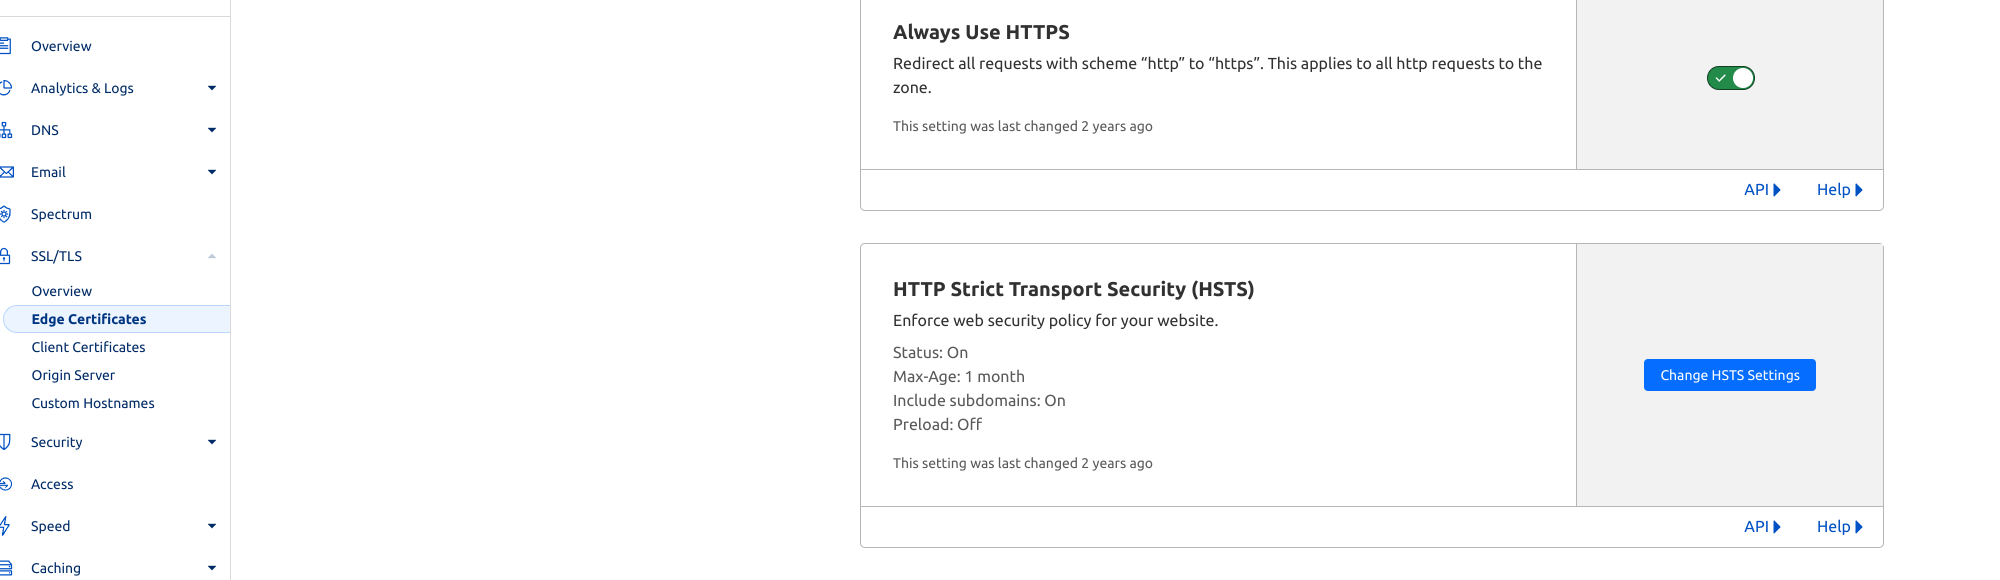
Always use HTTPS
Optional if you've already configured your proxy server to redirect http to https. It's just an extra optimization - Cloudflare will intercept the request before your server and redirect to https.
HSTS
By enabling HSTS, you can ensure that browsers connecting to your website will always use HTTPS instead of HTTP, even if users accidentally type in "http://" in their browser's address bar.
Ok, you've got your redirection from http to https, then why be redundant with HSTS?
- You'll have browser protection against protocol downgrade attacks: Even with server-side redirects, an attacker can intercept an initial HTTP request before the server has a chance to redirect it to HTTPS. Attacker can still do it, but not from browser.
- Improved performance: When a browser has the HSTS header cached for a website, it automatically switches to HTTPS without needing to wait for the server to send a redirect response. This reduces the number of round-trip communications between the browser and server, improving page load times and overall website performance.
Troubleshooting an invalid SSL certificate
You might have noticed the featured image of this post, the invalid ssl certificate Cloudflare landing page. I sometimes get this error if I missed something in my steps:
- Double-check the SSL certificate and private key files for typos, spaces, or other inaccuracies.
- Ensure that you have the correct root certificate installed and configured.
- Verify that the domain name in the SSL certificate matches the domain name on your server.
But other reasons might be that it expired or Cloudflare still reads it from cache.
Try purging the cache, see if there are any errors logged on your origin server. If origin server is not logging anything, then try again recreating the root certificates and save on the server.
- Is your A or CNAME DNS record correct, was the change recent?
For other issues, this CF resource is useful.


