You do not need to enable static website hosting and unblock public access. Following this instruction, your S3 bucket is secure behind a Cloudfront distro. It’s not only for Next.js app, but I did document this following my own Next.js setup.
Table of Contents
Create Origin Certificates
Origin certificates will be used for Cloudfront distribution. I recommend this step done first, as it can take a few minutes for aws verification to pass and cloudfront dns changes to be available.
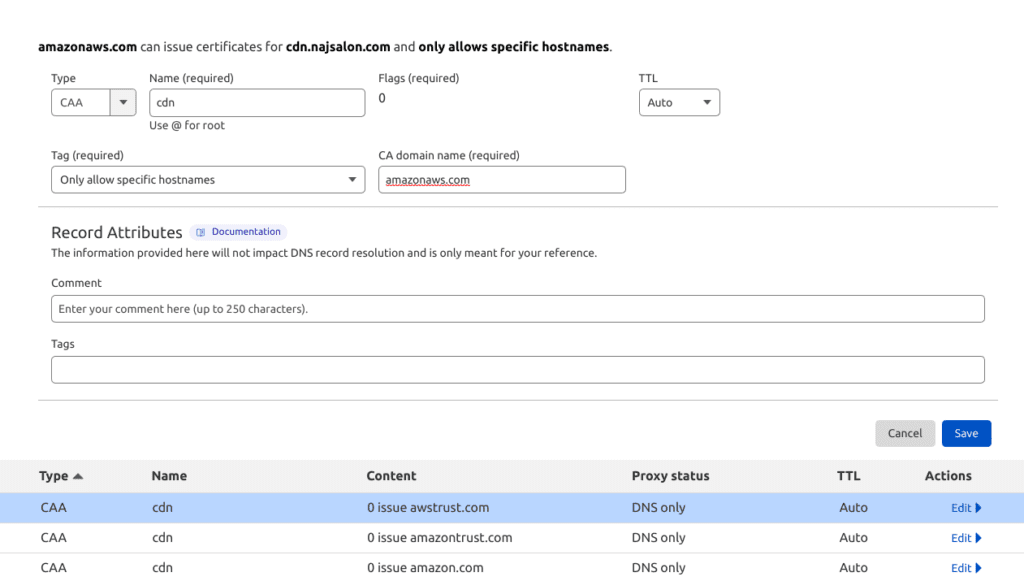
1. CAA Records
Before requesting origin certificates be sure to add CAA records in your DNS settings.
CAA records indicate which hosts are allowed to issue certificates for a domain. This step is a prerequisite for aws origin certificates to avoid One or more domain names has failed validation due to a certificate authority authorization (CAA) error.
In my DNS Cloudflare settings it looks like this:
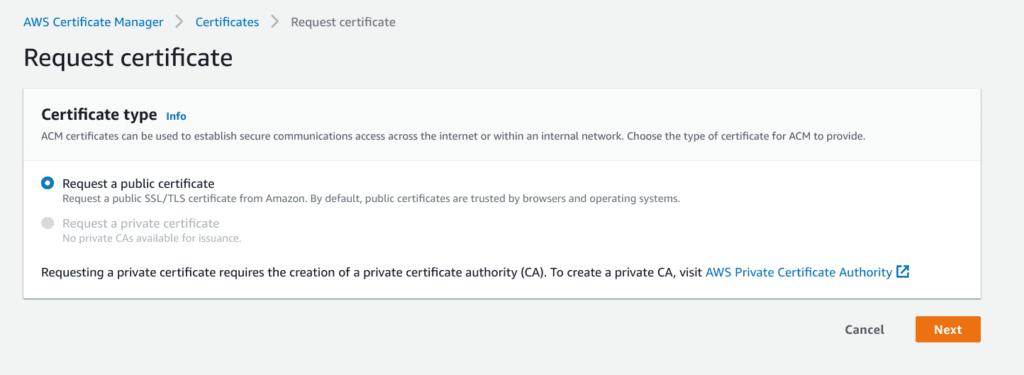
2. Request Origin Certificate
To use an ACM certificate with CloudFront, make sure you request the certificate in us-east-1 region.
- Go to certificate manager and click to Request new.

- Request a public certificate, click next.
- Enter your cdn subdomain. Choose dns validation, it’s faster. Click on create and refresh screen.
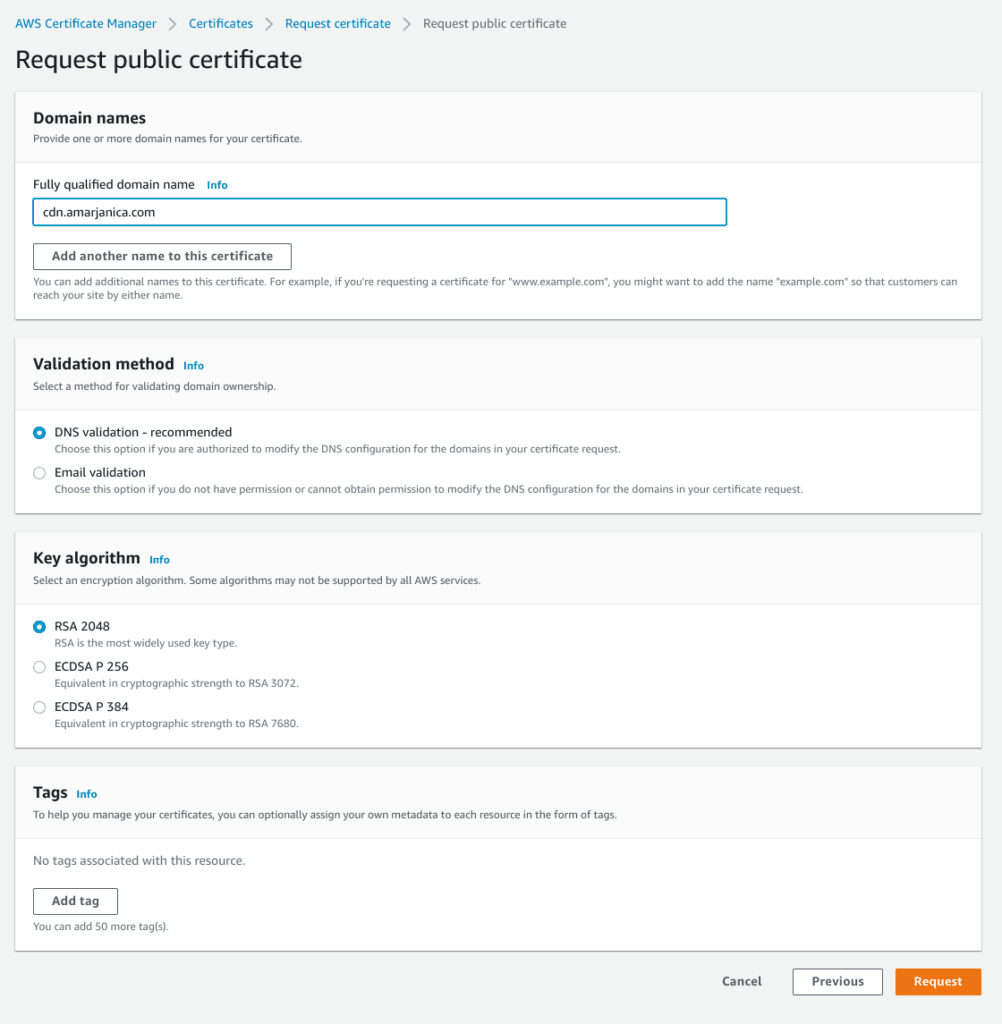
- Click on your created certificate, there will be a CNAME dns record you need to add in your dns settings for aws validation purpose.

- Go to cloudflare dns, add a new cname record, turn off proxying for that record.

It takes a few minutes for aws to validate via dns. When you see a green approved status on the requested certificate record, proceed to next step.
3. Create Cloudfront distribution
Go to aws -> cloudfront -> click on create distribution.
- In the origin record, select your s3 bucket or enter your origin domain. I prefer S3 bucket for static asset holding, and there’s a blog post on configuring S3 for syncing data from elastic beanstalk.
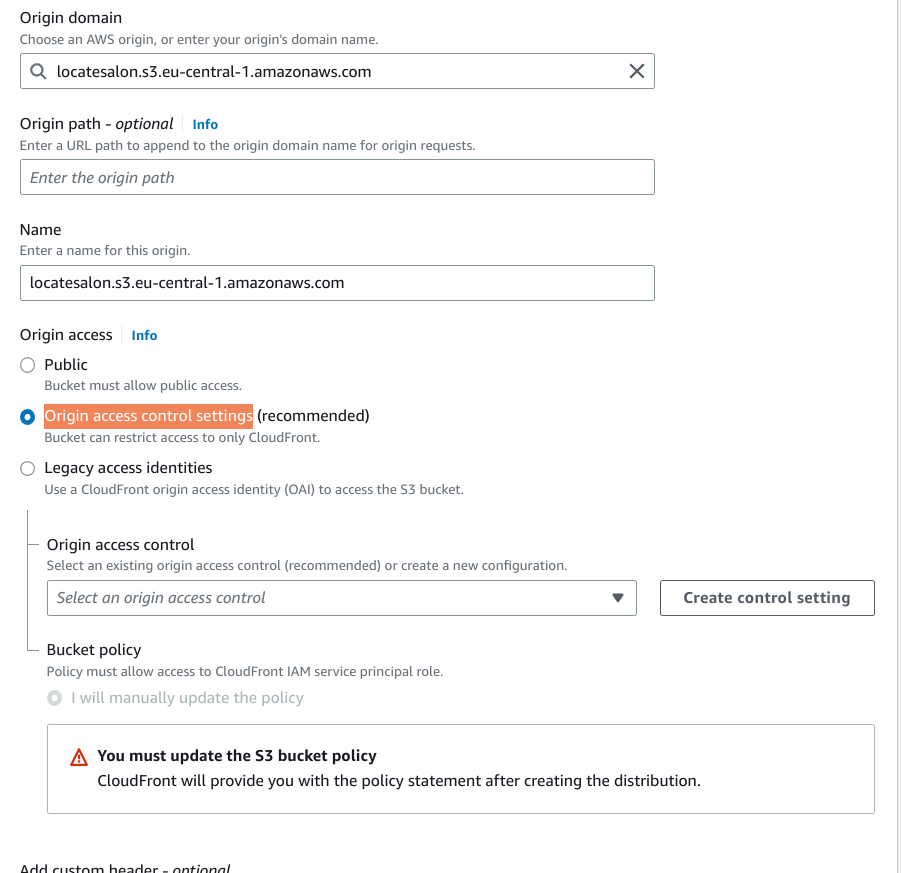
- At origin access, I prefer the Origin access control settings instead of public access. Data should be accessible to public only behind a Cloudflare distro.
- Create a new control setting, and checking the signing requests is important!

- when asked to Compress objects automatically, select Yes.
4. Update S3 Policy
To allow Cloudfront access I need to update S3 permission policy. Policy must allow access to CloudFront IAM service principal role.
When you have created a Cloudfront distro, you’ll see a blue notification bar at the top.

Copy your policy. Then go to your S3 bucket permissions, and edit bucket policy.
My final policy looks like this:
{
    "Version": "2008-10-17",
    "Statement": [
{
            "Sid": "AllowCloudFrontServicePrincipal",
            "Effect": "Allow",
            "Principal": "*",
            "Action": "s3:GetObject",
            "Resource": "arn:aws:s3:::locatesalon/*",
            "Condition": {
                "StringEquals": {
                    "AWS:SourceArn": "arn:aws:cloudfront::1111:distribution/EEEE"
                }
            }
        }
        {
            "Sid": "yoursid",
            "Effect": "Allow",
            "Principal": {
                "AWS": "arn:aws:iam::1111:role/aws-elasticbeanstalk-ec2-role"
            },
            "Action": [
                "s3:ListBucket",
                "s3:PutObject",
                "s3:PutObjectAcl",
                "s3:GetObject",
                "s3:GetObjectAcl",
                "s3:DeleteObject"
            ],
            "Resource": [
                "arn:aws:s3:::locatesalon",
                "arn:aws:s3:::locatesalon/*"
            ]
        }
    ]
}
I want to allow elastic beanstalk to perform crud operations, and only public access should be behind Cloudfront. I have to repeat myself again, you do not need to enable static website hosting and unblock public access.
4. Point Cloudfront to subdomain
The only thing missing is pointing a Cloudfront to my subdomain.
- Go to Cloudflare dns settings, add a new CNAME record cdn.yourdomain.com to point to Cloudfront distribution. Turn off proxying.
- Edit your Cloudfront distribution. Add alternate domain name as your subdomain, select a certificate from dropdown and save.
Now you should be able to access Cloudfront with your subdomain. If there’s nothing yet cached, you should see a response from s3 bucket.

Caching S3 data from Cloudfront
By default Cloudfront is configured as a proxy for S3 data, and as any other proxy pattern it can apply other settings before a pass through happens. If you experience low scores with lighthouse or gtmetrix page speed, you can bump those scores with Cache-Control header.
There’s no need to setup anything on the origin server, just go to your Cloudfront distribution.
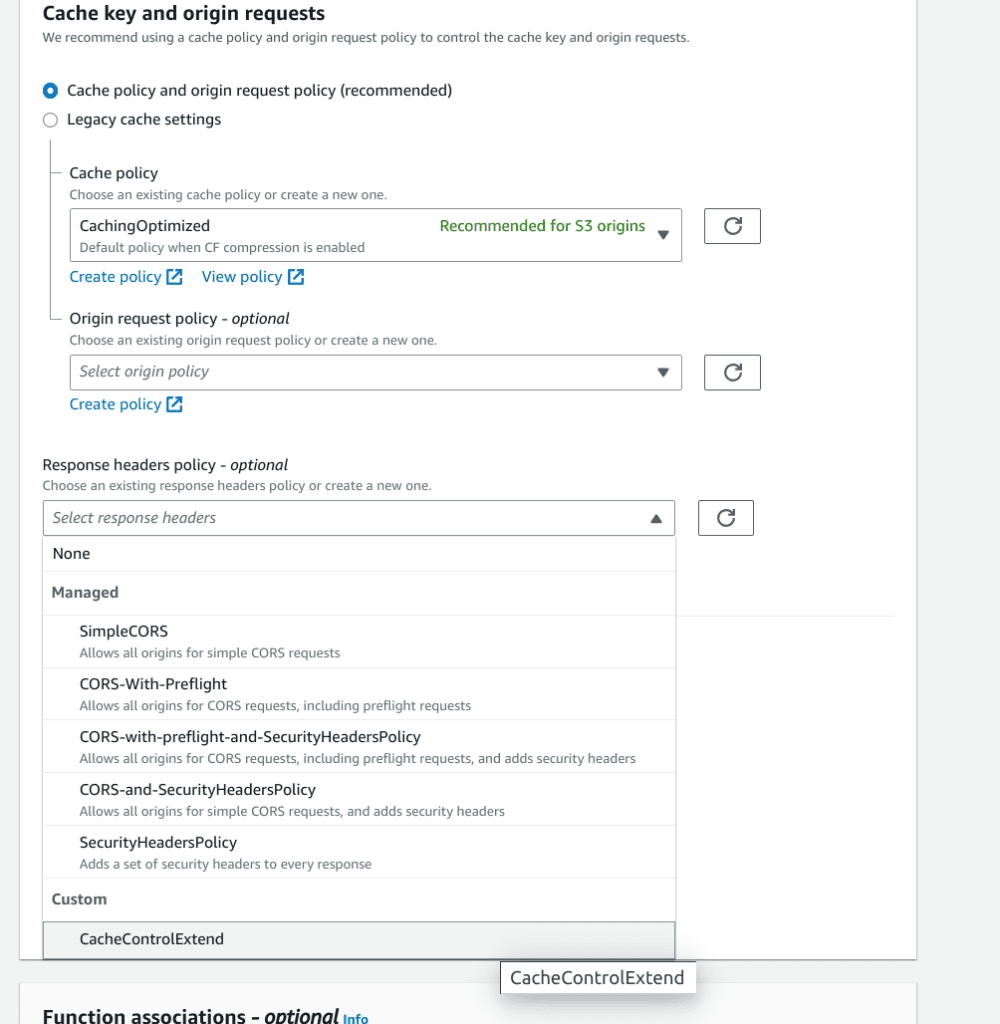
- Go to Behaviors, edit settings. Scroll down until you see Response headers policy – optional.
- Create a new policy. I named it CacheControlExtend.
- Add Cache-Control header and max age. Mine expires in a year.
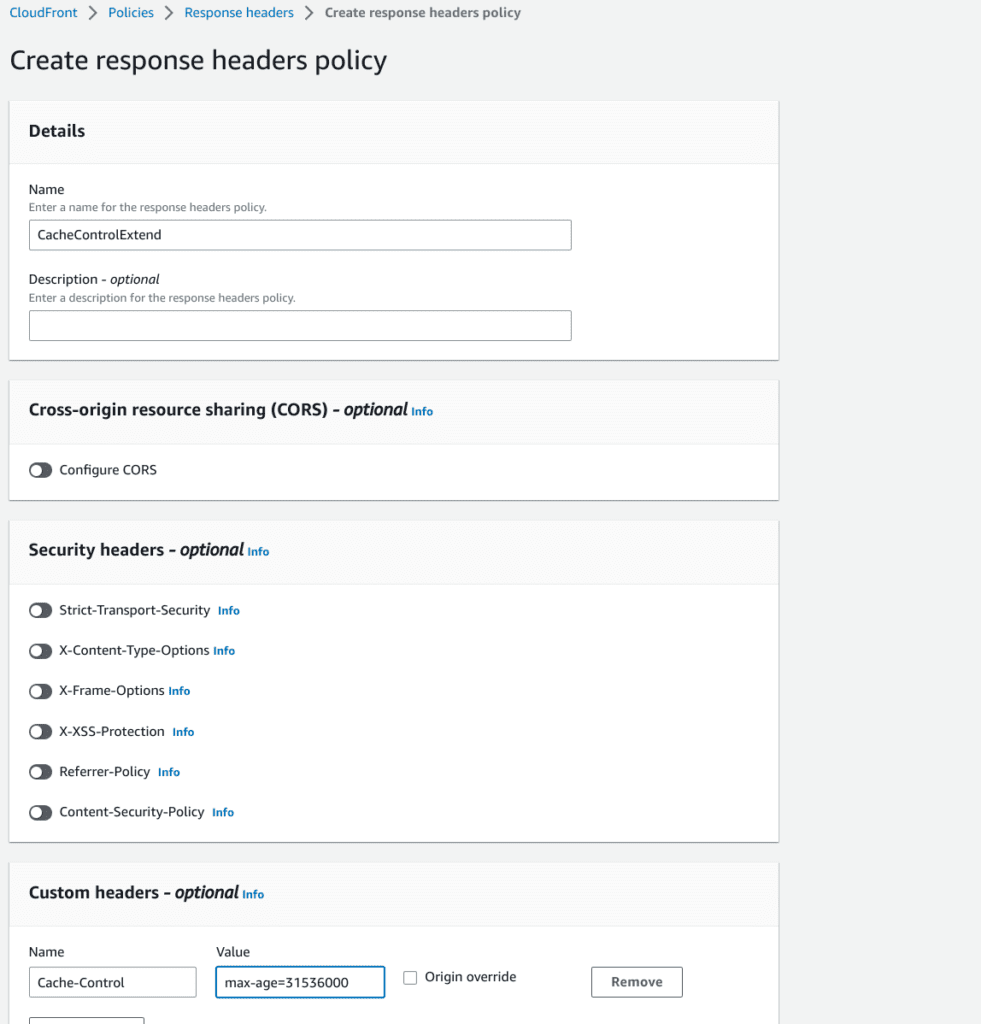
- And apply that policy, save, wait until distribution is deployed again. Recheck pagespeed.
Compress – Serve gzipped data
Next.js has a compress setting for serving compressed static data. That option is irrelevant for production. You will usually serve behind nginx, apache or, in this case Cloudfront.
Cloudfront compress works automatically if you selected Compress objects automatically.
If you didn’t enable compress upon creating a distro, you can enable it in Behavior setting.
And don’t forget to invalidate data afterwards!
I forgot to check the box in my initial setup. Then I applied the above proposed fixes and my css file went from 17kb to 5.6kb.

2 Comments
Alexander Giagoulas · January 23, 2023 at 8:38 pm
Hi Ana,
Thank you very much for this great tutorial!
Ana Bujan · January 24, 2023 at 12:19 pm
Thanks for reading!